~/swc/curriculum main ± sqlite3 --version
3.37.0 2021-12-09 01:34:53 9ff244ce0739f8ee52a3e9671adb4ee54c83c640b02e3f9d185fd2f9a179aapl
~/swc/curriculum main sqlite3
SQLite version 3.37.0 2021-12-09 01:34:53
Enter ".help" for usage hints.
Connected to a transient in-memory database.
Use ".open FILENAME" to reopen on a persistent database.
sqlite> .quit
~/swc/curriculum main SQL 환경설정
1 데이터베이스 시스템
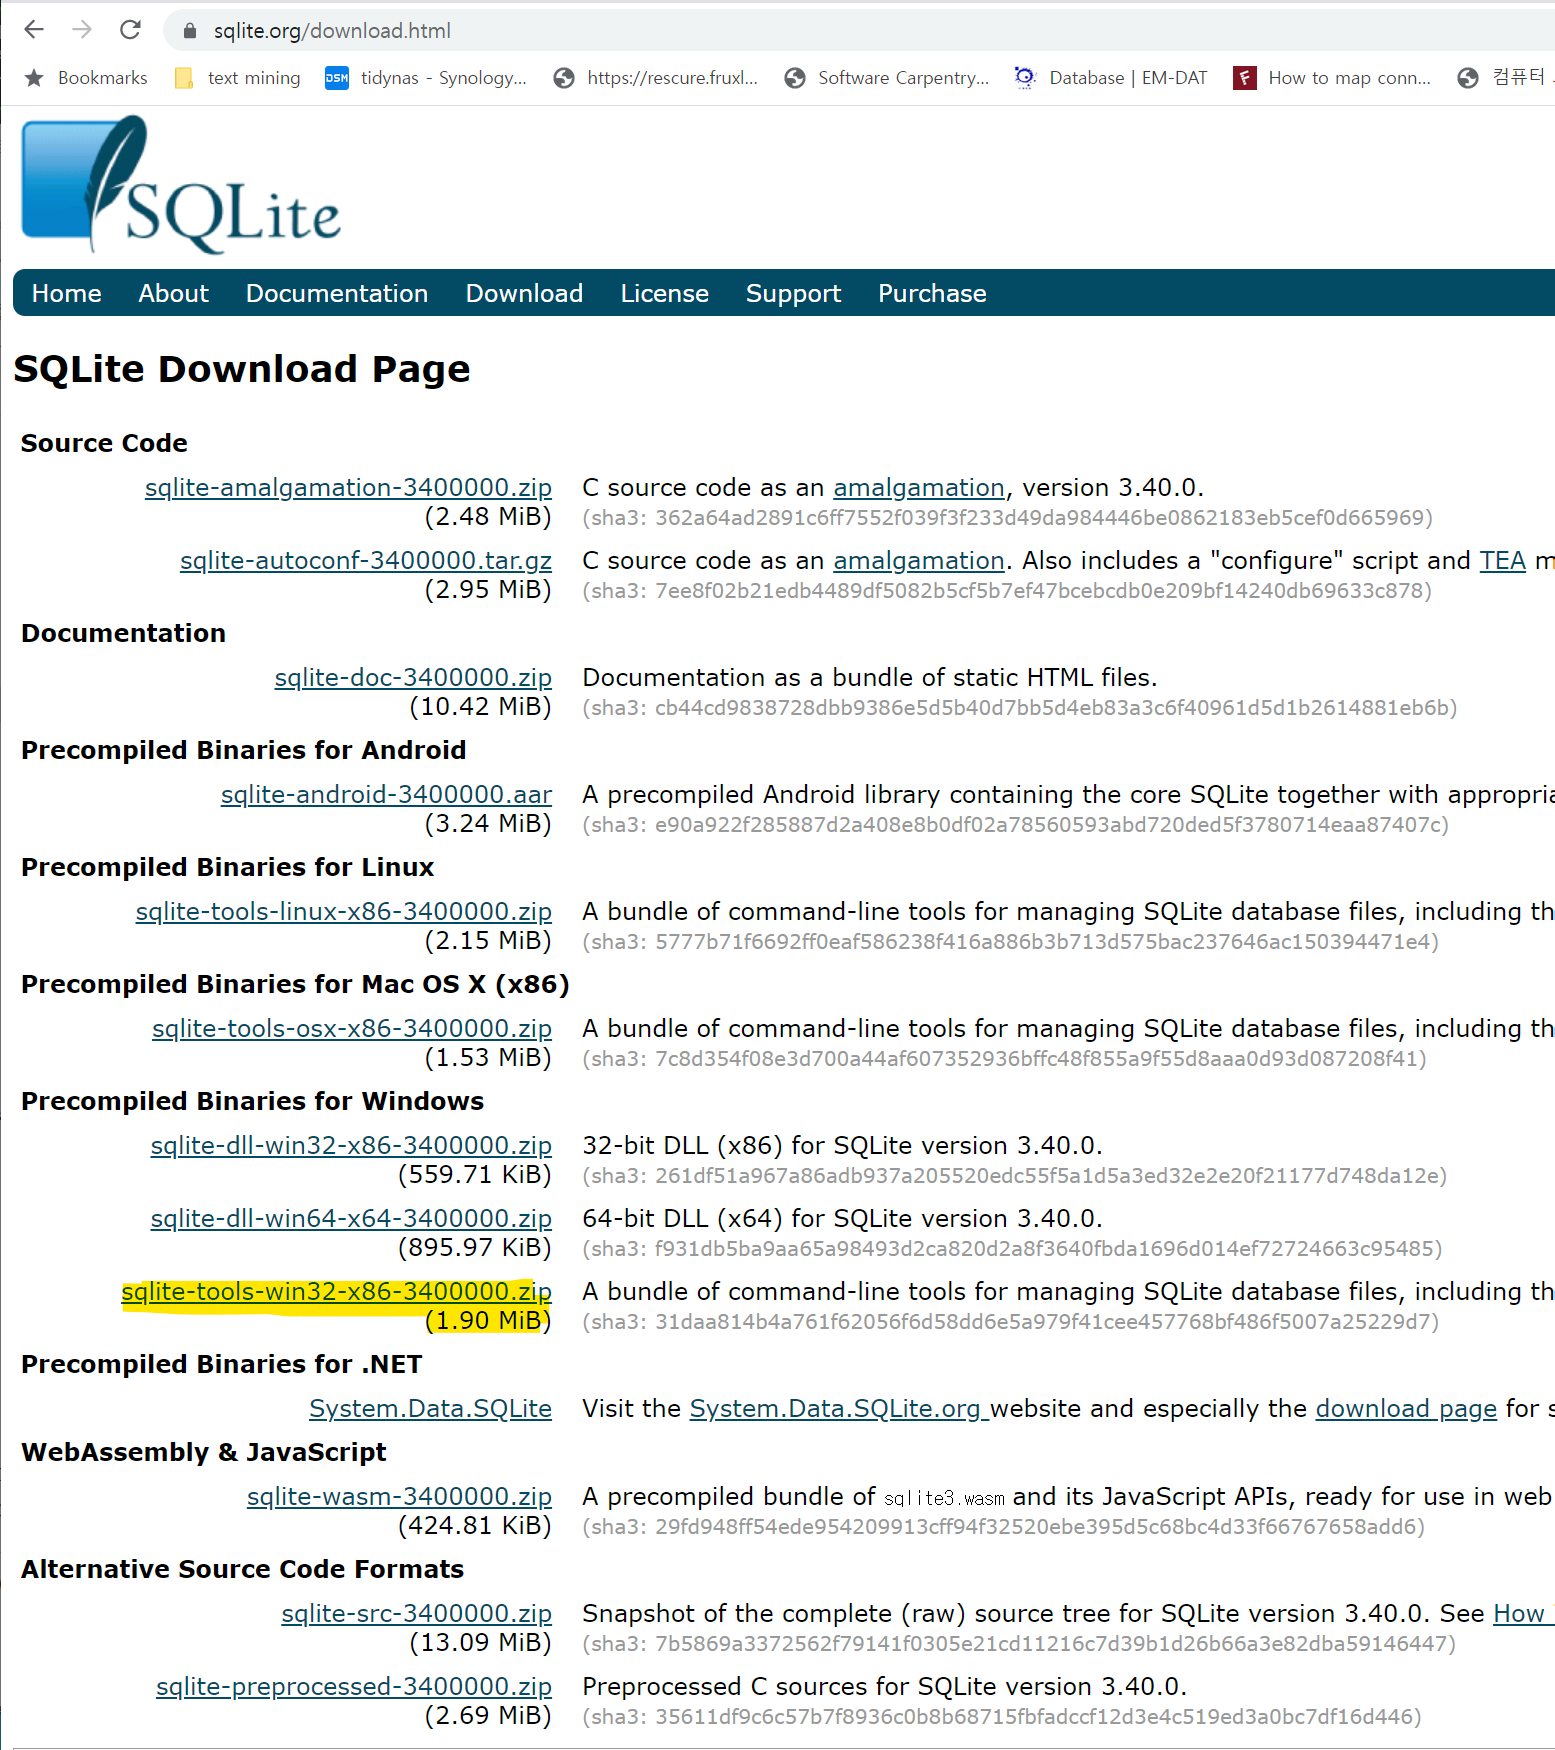
SQLite 다운로드 웹사이트에서 운영체제에 적합한 SQlite 소프트웨어를 설치한다.
1.1 윈도우즈
예를 들어, 윈도우 10 환경에서 “Precompiled Binaries for Windows” → sqlite-tools-win32-x86-3400000.zip 파일을 다운로드 받는다.
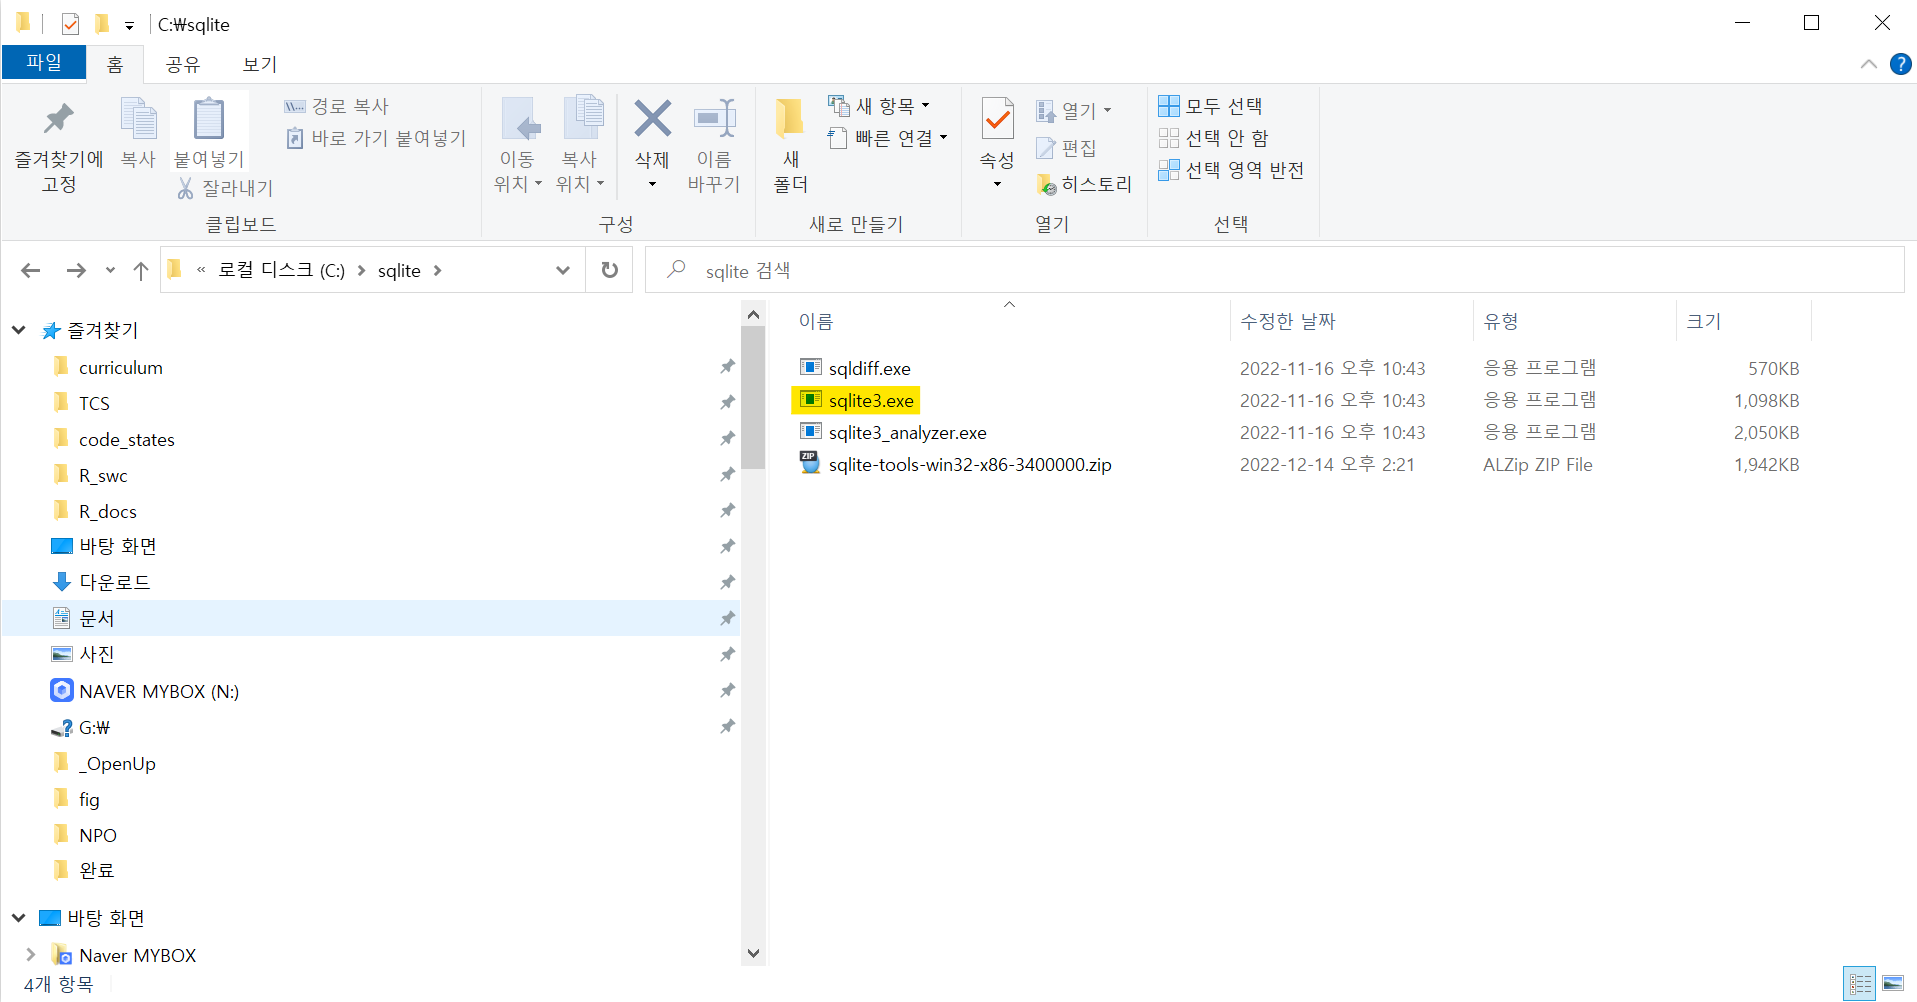
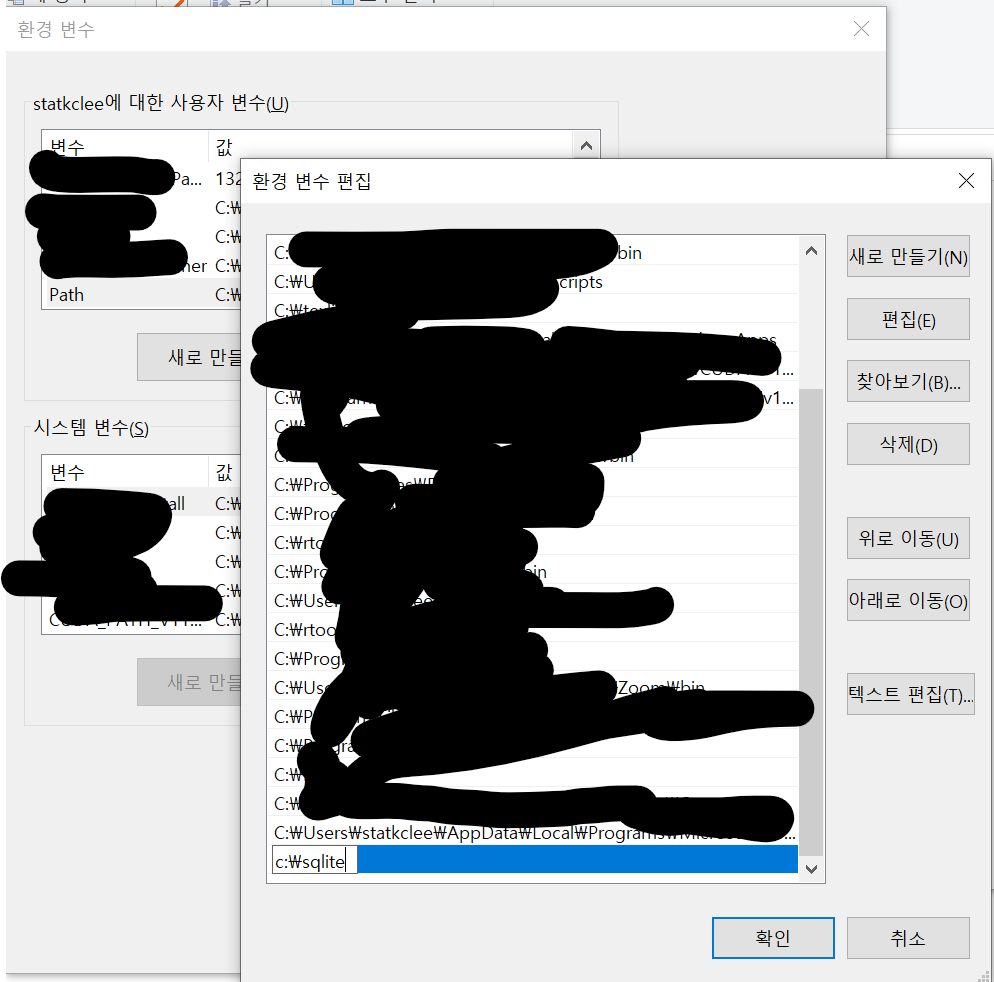
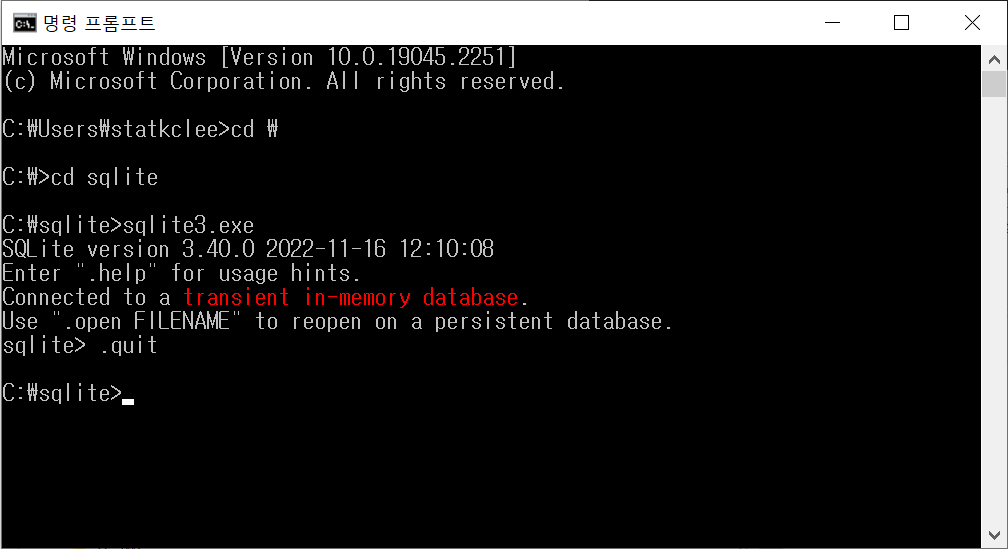
다음으로 압축을 풀어 다음 순서로 설치를 완료하고 정상적으로 설치되었는지 확인한다.
1.2 맥 설치
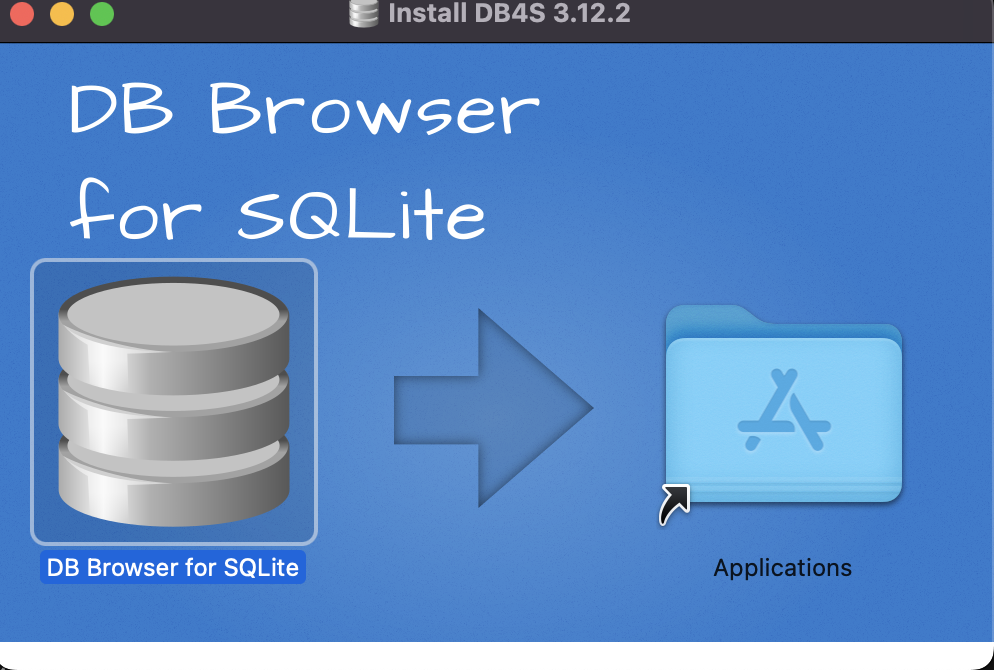
맥에서 Sqlite를 설치하는 방법은 매우 단순하다. DB Browser for SQLite 웹사이트에서 맥버전(Intell or Apple Silicon) 버전을 다운로드 받아 설치하면 된다.
2 데이터베이스: survey.db
소프트웨어 카페트리 학습용 survey.db 파일을 다운로드하여 data/survey.db로 저장시킨다. 콘솔에서 데이터베이스 테이블을 확인하고 테이블 중 한 테이블을 골라 SQL 쿼리를 보낸다.
fs::dir_create("data")

download.file(url = "https://github.com/swcarpentry/sql-novice-survey/raw/gh-pages/files/survey.db",
              destfile = "data/survey.db")
trying URL 'https://github.com/swcarpentry/sql-novice-survey/raw/gh-pages/files/survey.db'
Content type 'application/octet-stream' length 6144 bytes
==================================================
downloaded 6144 bytes3 SQL 쿼리
3.1 명령라인
SQlite가 설치되고 데이터베이스가 있다면 SQL 쿼리문을 작성하여 원하는 결과를 얻을 수 있다.
~/swc/curriculum main ± sqlite3 data/survey.db
SQLite version 3.37.0 2021-12-09 01:34:53
Enter ".help" for usage hints.
sqlite> .table
Person Site Survey Visited
sqlite> SELECT * from Person;
dyer|William|Dyer
pb|Frank|Pabodie
lake|Anderson|Lake
roe|Valentina|Roerich
danforth|Frank|Danforth
sqlite> .quit3.2 쿼리도구
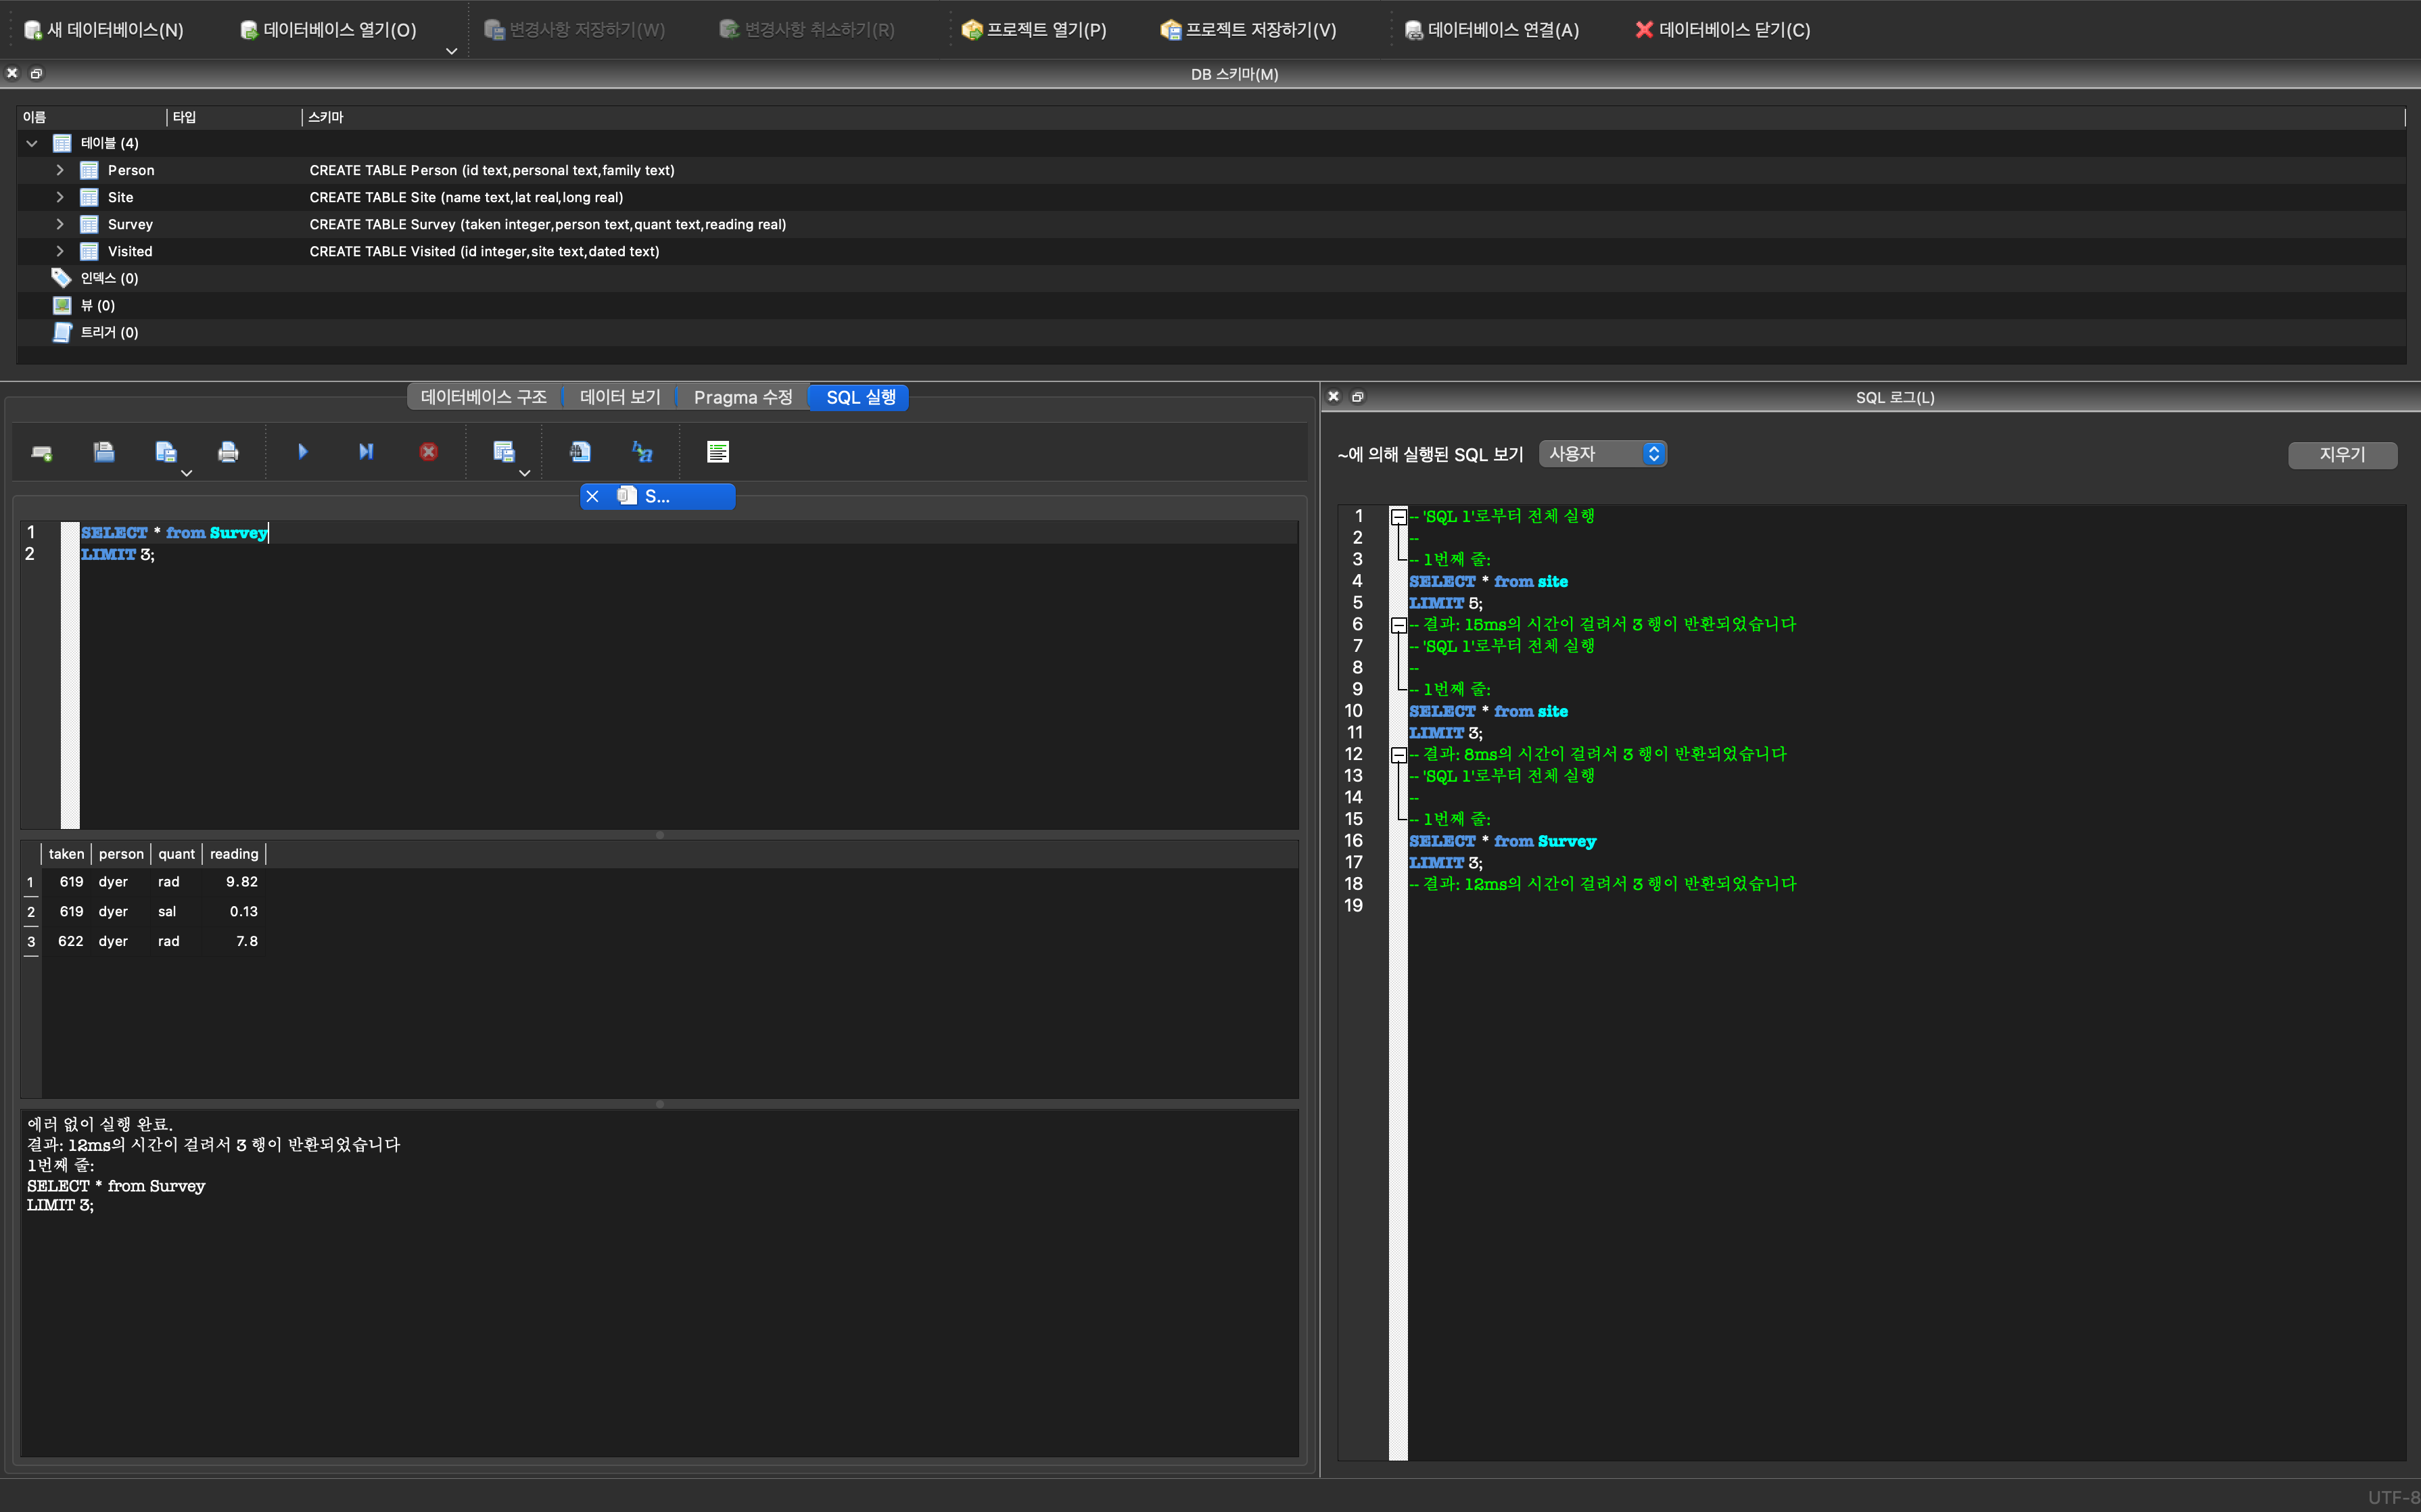
동일한 사항을 DB Browser for SQLite 쿼리도구를 사용하면 직관적으로 다양한 SQL 문을 데이터베이스에 던져 원하는 결과를 얻을 수 있다.
4 DuckDB
DuckDB는 “SQLite for Analytics” 별명을 갖고 있다. 과거 OLAP(online analytical processing)을 OLTP와 함께 회자되던 시절이 있었고 그 OLAP을 구현하는 것으로 이해할 수 있다.
4.1 데이터셋
NYC Taxi Trip Data - Google Public Data 데이터셋은 구글 빅쿼리(Bigquery) 공개 데이터셋중 일부로 뉴육택시 운행 천만건을 담고 있다. 뉴욕 택시 데이터셋에 대한 자세한 정보는 캐글 웹사이트에서 확인할 수 있다.
4.2 데이터베이스
duckdb패키지를 설치하여 taxis.duckdb를 파일로 생성하고 연결을 시켜둔다.
library(tidyverse)
library(duckdb)
library(DBI)
library(vroom)
library(tictoc)

database_path <- paste0(here::here(), "/data/taxis.duckdb")
file.remove(database_path)
con <- dbConnect(duckdb(), dbdir = database_path)
dbListTables(con)
data\ 디렉토리 아래 뉴욕 택시 운행 데이터와 duckdb가 하나 파일명으로 taxis.duckdb 생성된 것이 확인된다.
fs::dir_tree("data")data
├── B사감과러브레터.txt
├── hangul_sosul.txt
├── original_cleaned_nyc_taxi_data_2018.csv
├── survey.db
└── taxis.duckdb4.3 테이블 추가
duckdb 데이터베이스에 뉴욕택시 데이터셋을 테이블로 추가한다.
taxis_path <- paste0(here::here(), "/data/original_cleaned_nyc_taxi_data_2018.csv")
table_create_qry <- glue::glue(
  "CREATE TABLE trips AS SELECT * FROM read_csv_auto ('{taxis_path}')"
  )
dbExecute(con, table_create_qry)
[1] 83199284.4 테이블 확인
dbListTables() 명령어로 데이터베이스 내 테이블이 제대로 올라갔는지 확인한다.
dbListTables(con)[1] "trips"4.5 DB 연결 끊기
con으로 DB에 연결을 했다면 다음으로 연결을 dbDisconnect() 명령어로 연결을 해제한다.
dbDisconnect(con, shutdown=TRUE)4.6 SQL 쿼리
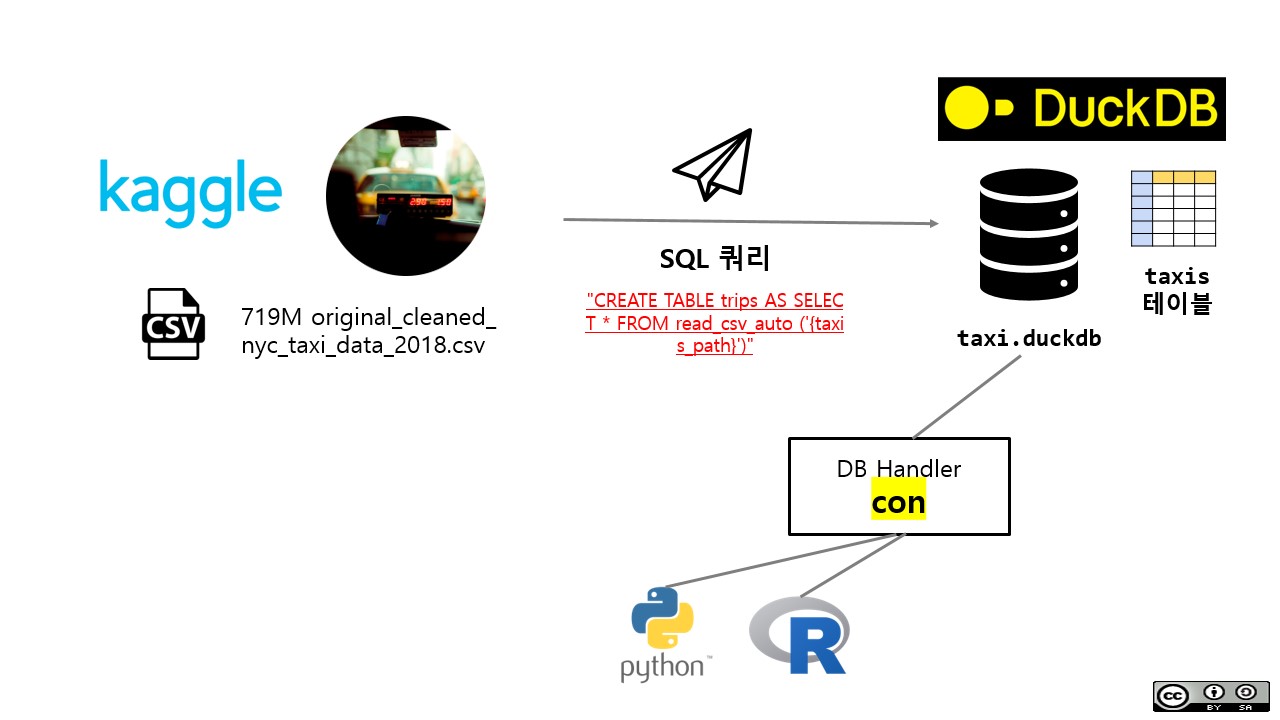
지금까지 작업한 사항내용을 그림으로 요약하면 다음과 같다.
- 파일 duckDB 데이터베이스를 생성한다.
- 데이터베이스에
conDB 핸들러를 통해 R/파이썬 연결을 시킨다. - CSV 파일을 테이블로 데이터베이스에 올린다.
- 정상적으로 테이블이 데이터베이스에 등록되었는지를 확인한다.
- DB 핸들러를 반납하고 연결을 해제시킨다.
이제부터 본격적으로 OLAP 분석작업을 수행한다. 파일 “/data/taxis.duckdb” 데이터베이스에 DB 핸들러를 연결시킨다. 그리고 나서 분석대상 테이블이 존재하는지 dbListTables() 명령어로 확인한다.
library(tidyverse)
library(duckdb)
library(DBI)
library(vroom)
library(tictoc)

database_path <- paste0(here::here(), "/data/taxis.duckdb")

con <-dbConnect(duckdb::duckdb(), dbdir = database_path, read_only=TRUE)

dbListTables(con)
[1] "trips"tictock 패키지를 통해 해당 쿼리가 수행되는데 실행된 시간을 측정한다.
tic()

fare_summary <- con |>
  tbl("trips") |>
  dplyr::select(payment_type, fare_amount, trip_distance) |>
  filter(trip_distance > 18) |>
  group_by(payment_type) |>
  summarise(average_fare = mean(fare_amount, na.rm = TRUE)) |>
  collect()

toc()
0.11 sec elapsedfare_summary# A tibble: 4 × 2
payment_type average_fare
<int> <dbl>
1 1 65.4
2 2 60.9
3 3 62.5
4 4 67.14.7 SQL 문
dplyr 데이터 핸들링 문법이 매우 직관적이고 사용하기 편하다. 이를 SQL문으로 변환하는 것도 단순하다. 이를 동일하게 SQL 문으로 작성하여 쿼리문을 던져 분석작업을 수행하자.
library(dbplyr)

trips_db <- tbl(con, "trips")

trips_sql_query <- trips_db %>%
  dplyr::select(payment_type, fare_amount, trip_distance) %>%
  filter(trip_distance > 18) %>%
  group_by(payment_type) %>%
  summarise(average_fare = mean(fare_amount, na.rm = TRUE)) %>%
  show_query()
<SQL>
SELECT payment_type, AVG(fare_amount) AS average_fare
FROM (
SELECT payment_type, fare_amount, trip_distance
FROM trips
) q01
WHERE (trip_distance > 18.0)
GROUP BY payment_typetrips_sql_query# Source: SQL [4 x 2]
# Database: DuckDB 0.6.1 [statkclee@Windows 10 x64:R 4.2.2/D:/tcs/curriculum/data/taxis.duckdb]
payment_type average_fare
<int> <dbl>
1 1 65.4
2 2 60.9
3 3 62.5
4 4 67.1동일한 결과를 dbGetQuery()함수로 결과값을 얻을 수 있다.
sql_query_from_dbplyr <- "SELECT payment_type, AVG(fare_amount) AS average_fare
FROM (
  SELECT payment_type, fare_amount, trip_distance
  FROM trips
) q01
WHERE (trip_distance > 18.0)
GROUP BY payment_type"

# dbGetQuery(con, "SELECT * FROM trips LIMIT 5;")
dbGetQuery(con, sql_query_from_dbplyr)
payment_type average_fare
1 1 65.40479
2 2 60.86640
3 3 62.52643
4 4 67.138954.8 DBeaver SQL 쿼리 도구
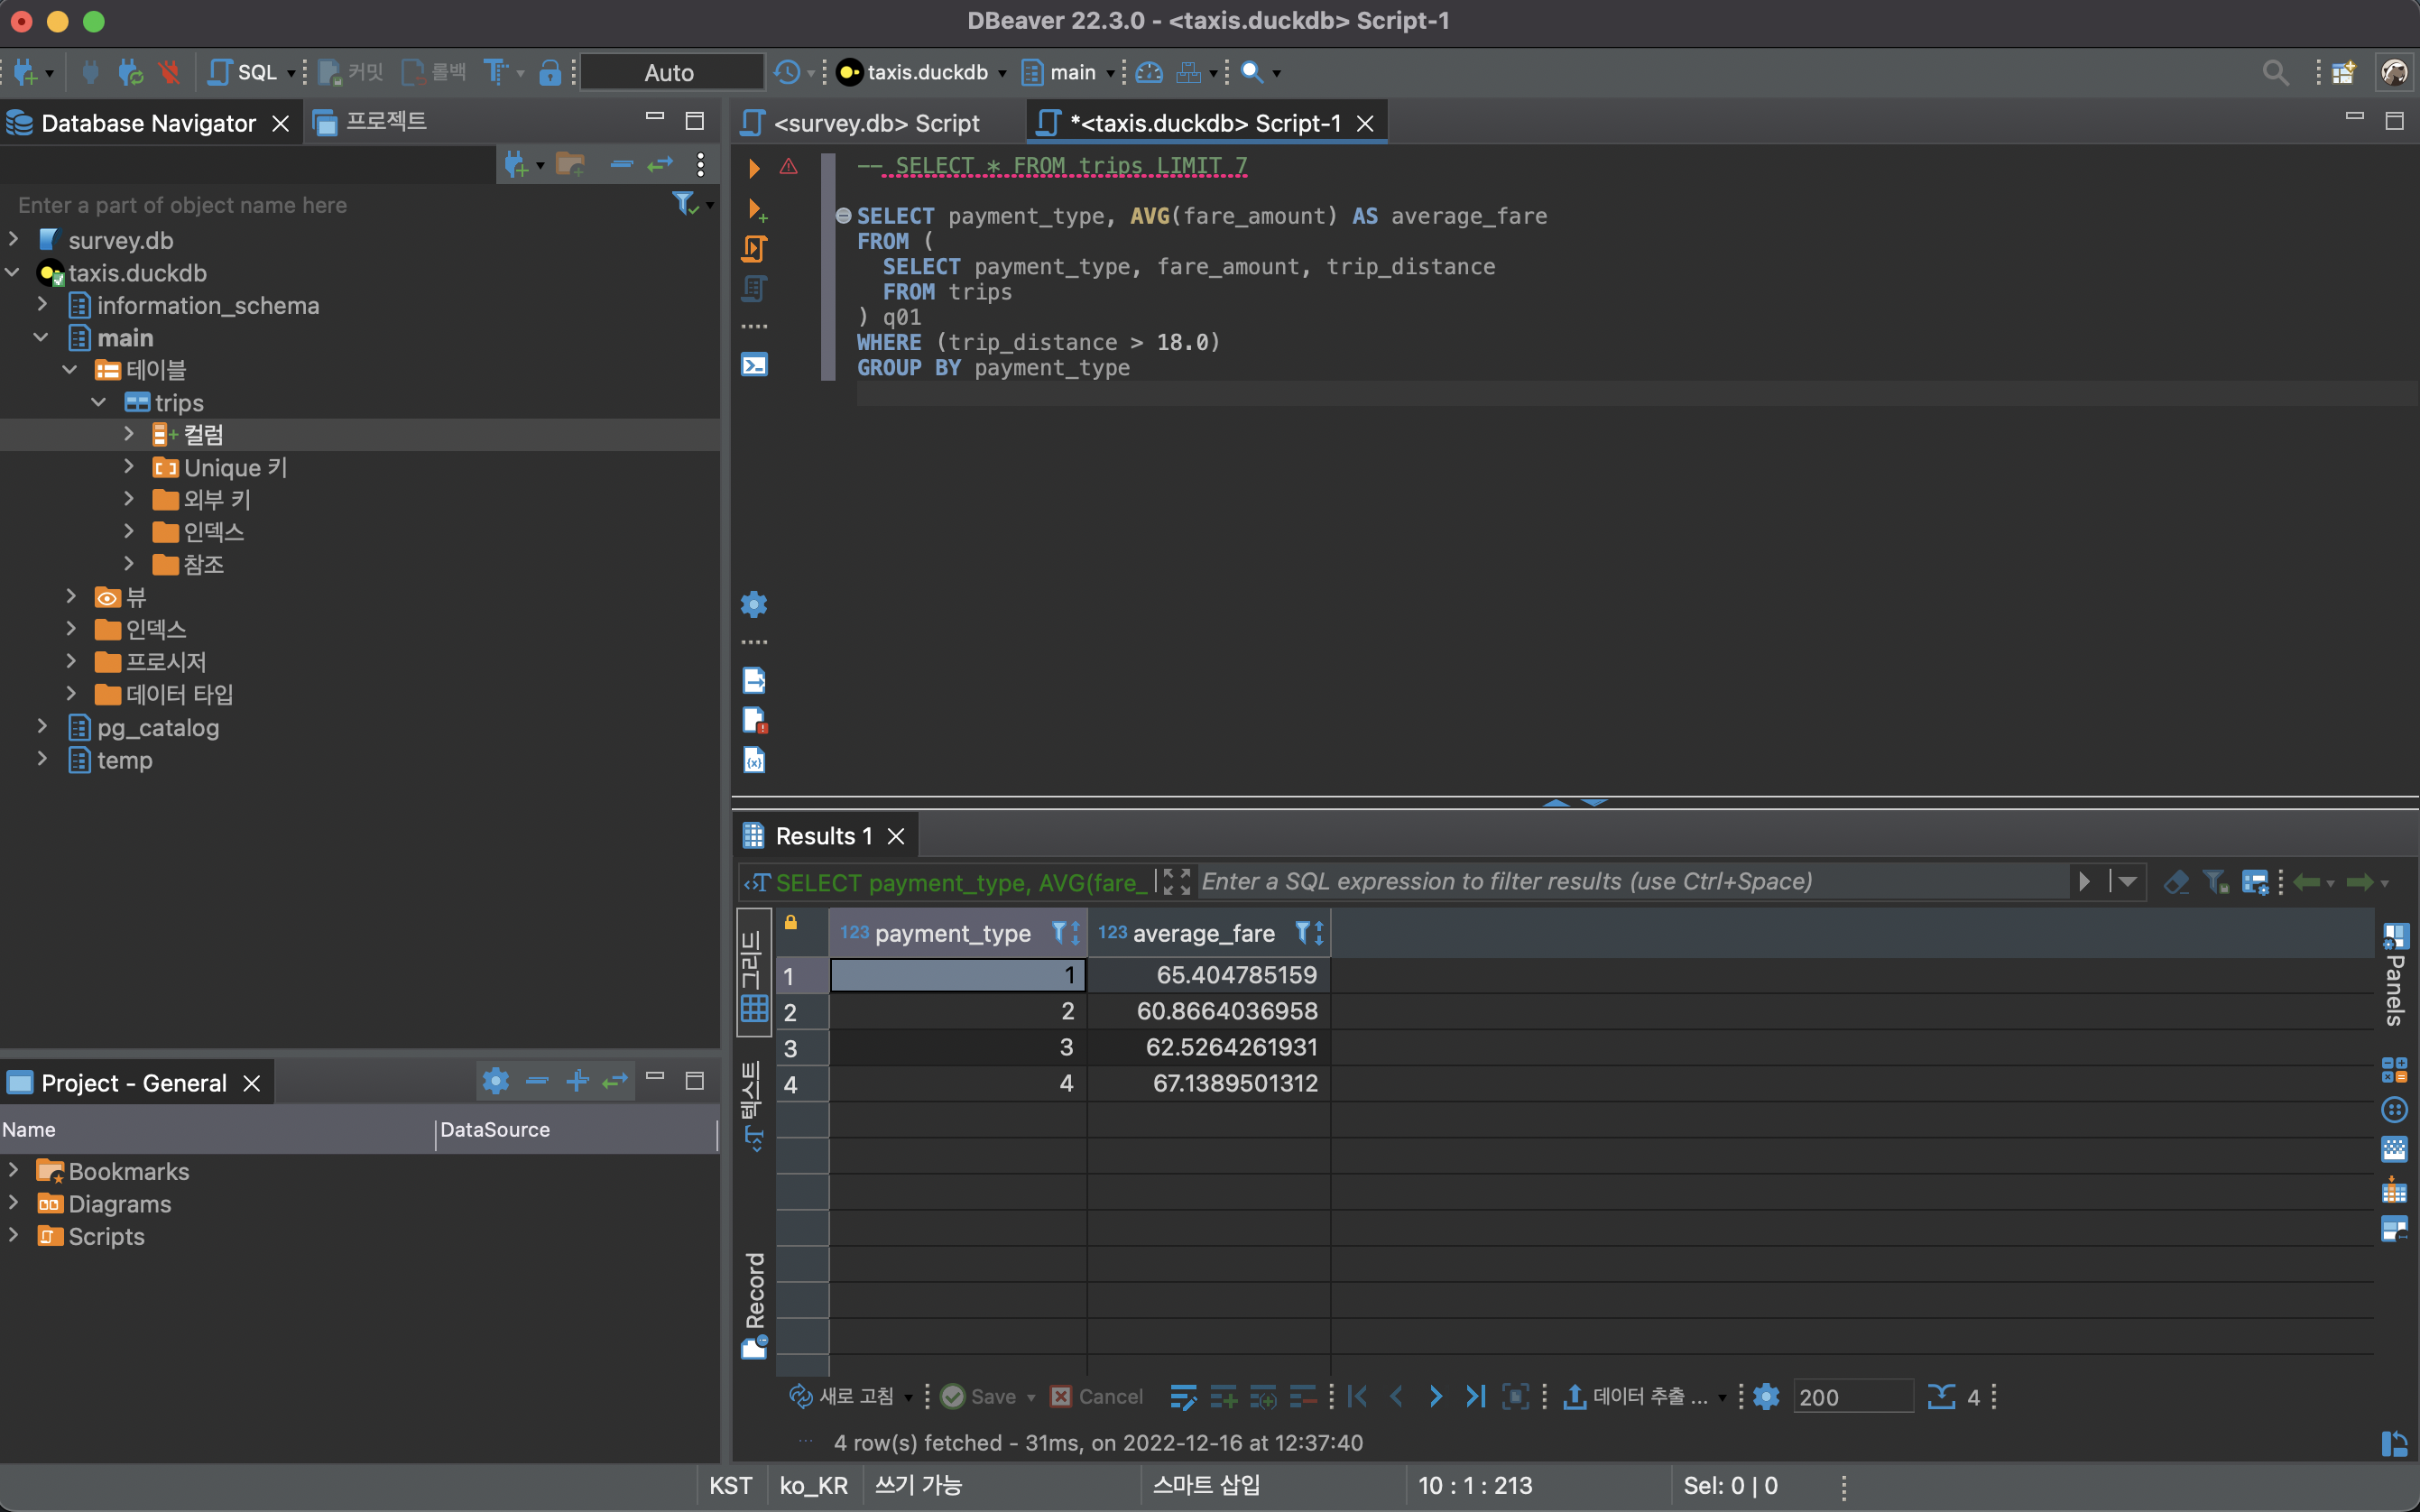
DBeaver Community - Free Universal Database Tool 도구를 다운로드 받고 앞서 구축한 뉴욕 택시 데이터베이스를 연결하면 동일한 결과를 얻을 수 있다.
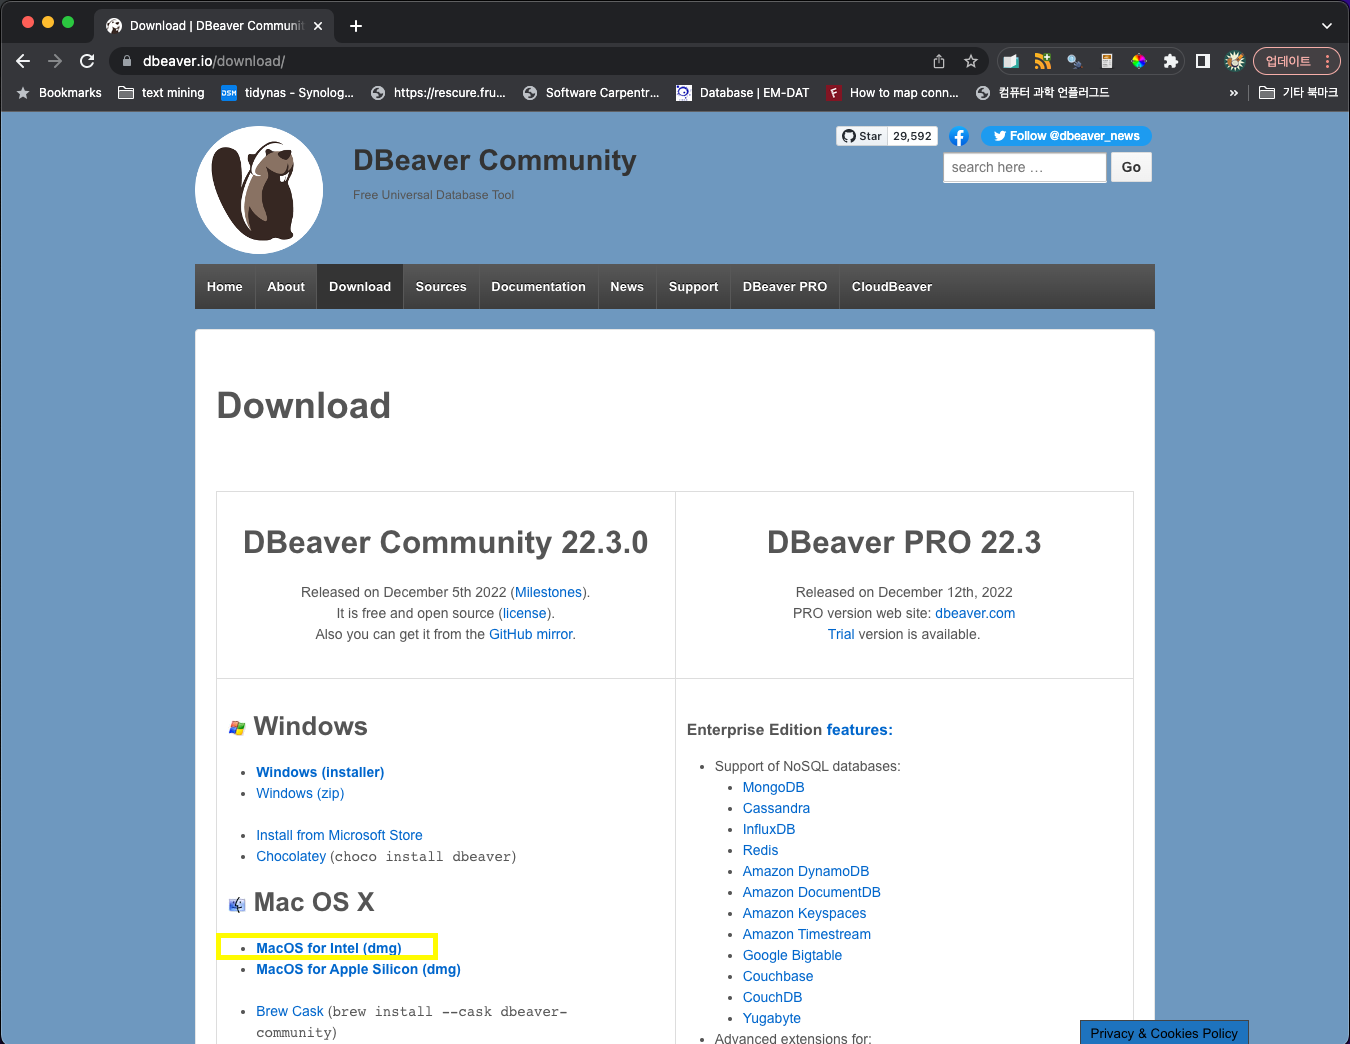
먼저, DBeaver Community - Free Universal Database Tool 웹사이트에서 운영체제에 맞는 SQL 쿼리 도구를 설치한다.
그리고 나서 앞서 dbplyr show_query() 함수를 사용해서 SQL 문을 복사하여 붙여넣기 하면 해당 결과를 얻을 수 있다.
4.9 파일 크기
뉴욕 택시 원본파일 크기를 살펴보자. 이를 위해서 fs패키지 file_info()함수를 사용해서 확인한다.
fs::file_info("data/original_cleaned_nyc_taxi_data_2018.csv") %>%
  select(path, type, size)
# A tibble: 1 × 3
path type size
<fs::path> <fct> <fs::bytes>
1 data/original_cleaned_nyc_taxi_data_2018.csv file 719MCSV 파일을 duckDB에서 가져왔을 때 데이터베이스 크기를 살펴보자.
fs::file_info("data/taxis.duckdb") %>%
  select(path, type, size)
# A tibble: 1 × 3
path type size
<fs::path> <fct> <fs::bytes>
1 data/taxis.duckdb file 258M5 데이터베이스와 쿼리도구
각 데이터베이스와 궁합이 맞는 다양한 SQL 쿼리도구가 있다. 적절한 도구를 사용하여 업무 생산성을 높혀보자.
| 순 | 데이터베이스 | SQL 쿼리도구 |
|---|---|---|
| 1 | SQLite DuckDB | DBeaver |
| 2 | MySQL | HeidiSQ L MySQL Workbench |
| 3 | postgreSQL | pgAdm in |
